


Home | Tutorials & Links | Free Patterns | 2000 | 2001 | 2002 | 2003 | 2004 | 2005 | 2006 | 2007 | 2008
| What is the Death Star?
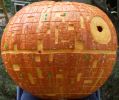
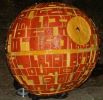
The Death Star, from the movie Star Wars, can be considered a hybrid "pumpkin carve/pumpkin sculpt". Pumpkin carving involves using the pumpkin almost as a surface for an image that is carved into the pumpkin. This is pretty much a 2D image. A pumpkin sculpt uses the pumpkin itself as a 3D object. Because the pumpkin itself is the object and not a pattern on a pumpkin, we can probably call it a sculpture. But unlike most sculptures, the way you carve it is exactly how you might do a pattern. So lets get started. If you have questions, please post them in the carvingpumpkins.com forum thread where the tutorial is posted. If its during pumpkin carving season, I will be looking at this regularly (but I might be carving, so wait a few hours for a response!). How Long Does it Take, and Is it Worth It? In all, if you start with a large pumpkin, you can expect to spend anywhere from 4 - 10 hours in making your Death Star. If you've never spent this long on a pumpkin, I can only tell you that if you're hoping for an awesome reaction, you will have a very hard time beating the Death Star. This thing is a HUGE hit with everyone. Even jaded teenagers are blown away. Even online, check out last year's Wired.com's contest for the geekiest pumpkin carves, and you'll see the Death Star sitting HIGH atop some absolutely terrific competition. What Skills Do I Need?: This tutorial assumes you have done pumpkin carving before. Specifically, I am not going through the details of how to do a skinned pumpkin carve, where you can either cut all the way through, cut just the skin off or leave the pumpkin skin on to have a 3-color pumpkin. If you're even mildly fluent with this type of pumpkin carving, you should find that Carving the Death Star is quite easy, if time consuming. If you need to learn the basics, I highly recommend going to the CarvingPumpkins.com Instructions section, and then to visit the Q&A board for questions. |
| Selecting a Pumpkin
Personally, I like to get large sized
pumpkins for the death star - somewhere between 70 and 120 pounds, but this
is not required. What IS necessary is that you find as round a pumpkin as
possible. For large pumpkins, this is very different from your normal
"pattern friendly" pumpkin, where you are looking for a nice flat side with
which to do a pattern. This is truly a messy chore if you
do a large sized pumpkin. You need to clean out the ENTIRE inside for the
parts you plan to carve (which is the entire front and sides). Chances are,
the larger pumpkins will have rounded ridges, which means in cleaning it
out, you'll need to be careful to not scrap everything evenly - you need to
scrape out the areas between the veins deeper than the veins themselves. |
 |
| Cleaning the Pumpkin This is truly a messy chore if you do a large sized pumpkin. On the larger pumpkins, the pumpkin goop will be around 5 inches deep. You'll eventually want to get this to around 1/2 inch thick. You need to clean out the ENTIRE inside for the parts you plan to carve (which is the entire front and sides). Chances are, the larger pumpkins
will have rounded or bowed humps coming out of the pumpkin. This means
when cleaning it out, you'll need to be careful to not scrap everything
evenly - you need to scrape out the areas between the veins deeper than the
veins themselves. If you get a large pumpkin, you'll find that you need to
put pretty much your entire arm inside the pumpkin to scrape it out.
Also, the goop is far more acidic and stinky on larger pumpkins. |
 |
| Tools Required For the most part, you need basic pumpkin carving tools, including a speedball set (you can get this at most craft stores, or can get it online here) and clay loop tools (also at craft stores or at the previous link) for shaving and smoothing the surface. There are a few extras though: Sewing Tape Measure You'll need a Sewing tape measure to get the initial pattern down. Lite Brites for Pumpkins |
|
|
STEP
1: Setting the Middle
The first, most important step in carving the Death Star is
creating a realistic looking "middle" line that goes across the entire
pumpkin front. Because the pumpkin will not be even, you need to spend a
little time figuring out exactly where the best, most "sellable" place to
cut will be. While attempting to find the right
place, I will tape the measuring tape down where I think it looks right, and
then step back to look at it. I will then slowly adjust it as I look
at it from all levels. Again, it should be somewhere in the middle, but
you'll need to make sure you leave enough space on the upper-end for a
decent sized laser hole. |
 |
|
STEP
2: Create the Horizontal Lines
Here's where the tape measure is dynamite. To make the Death
Star "work" you need to have proportional horizontal lines going across the
entire Death Star. Because the pumpkin isn't always even, this case pose a
problem. The solution? Make specific measurements up and down from the
center grove along the veins. |
 |
|
STEP
3: Positioning the Laser Circle
Now you need to find a space between the veins on the upper
part of the pumpkin that is most suitable for your laser hole. Ideally you
want something around 5" wide. But again, my rule of thumb is basically
to take up the bulk of the space between one area of the veins -
this seems to work. Adjust this if your pumpkin is smaller or larger. A good way to do this is to use a tea cup base, or perhaps even a large mug. Basically, find a nice circle object that is about the size of the thing you want. |
 |
|
STEP
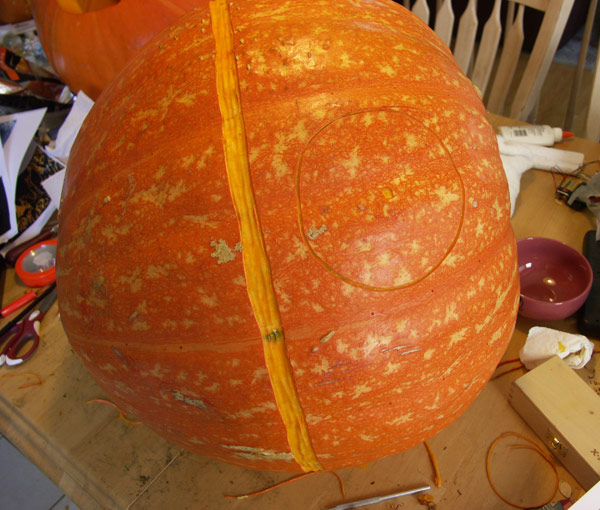
4: Carving Out the Circle Find some round object that seems to be about the size of the circle you are envisioning. In my case, I used a small bowl. Trace out the circle and then carve the outline with your speedball set.
|

|
| 4a:
Find the Center of Your Circle Then put a hole in the center of the circle. Ultimately, this is where your laser hole will be. You can start carving out the laser area now, but I tend to want to draw the horizontal lines before going further. Also if you look closely, you can see the dot markings along the pumpkin veins. This is where I'll be carving next. |
 |
| STEP 5: Carving the
Horizontal Lines Here's
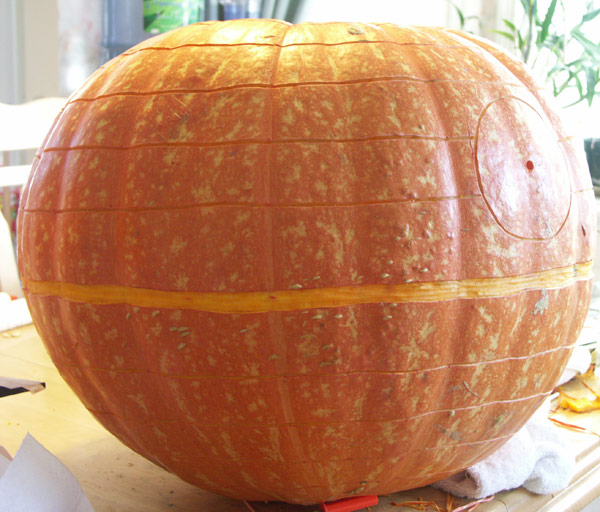
where your Death Star starts to take shape. Following the dots you made
along the veins, carve our horizontal lines with a medium sized speedball V
line cutter. |

|
| 5a: Don't Cut Into the Laser
Circle!!! Make sure you don't cut into the laser circle. You'll want that to be a clean circle without lines going into it. |
 |
|
STEP
6: Smooth the Center Groove
Now is a good time to go back and smooth out the center grove with a flat clay loop tool. As much as possible, you want it deep and smooth. The walls should be as straight down as you can make them. Important Tip: As you begin to cut out the detailed skinned areas, its a really good practice to smooth the areas out as you go along. If you wait till the end, you might find yourself missing a bunch of these, or worse, not caring as much because you already spent so much time on it. Do it as you go, and you'll end up with a far better pumpkin at the end. |
 |
|
STEP
7: Increase the Width of the Fourth Lines
Again, assuming you have a large
pumpkin, you'll want to increase the size of the fourth horizontal lines
above and below the middle groove. This is assuming you have 5 lines above
and below the middle groove. Depending on your pumpkin, you may only have 4
lines either above or below (or 6). Generally you want the larger line to
be at the apex of the curve on the top and bottom of the pumpkin -
hopefully with at least one more line past it. |
 |
|
STEP
8: Carving Out the First Row of Boxes
Now the fun part comes in. Starting
with the area above and below the center groove, make verticle cuts between
the lines approximately every 2 inches. Do this all the way around the
pumpkin till you get to the end. |
 |
| STEP 9: Carving Out the Rest
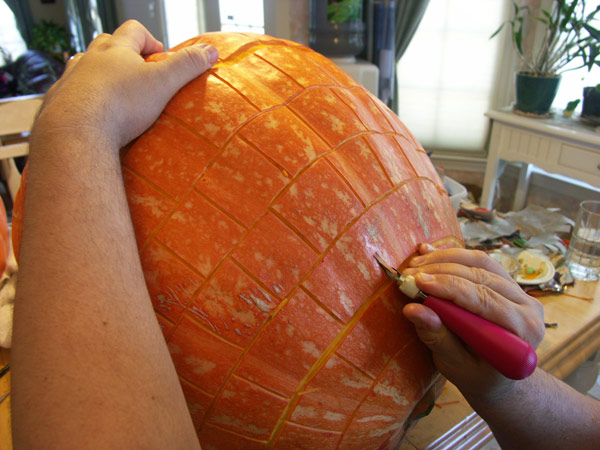
of the Death Star Once you've carved the boxes in the first row (again, avoiding the laser circle), you can do the subsequent rows. You really don't need to measure these - just make sure that you make lines in between the ones below (or above if you are working on the bottom half) the ones you just made. You might not want them all to be exactly in the center, either. Making some of them "close" the lines below allow you to do cool rectangles spanning three horizontal lines, for instance. |
|
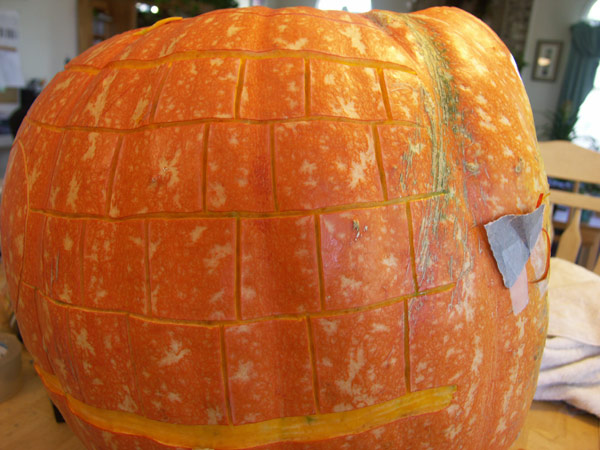
| 9a: Go All the Way, Baby! Once you've done the first row (again, avoiding the laser circle), you can do the subsequent rows. You really don't need to measure these - just make sure that you make lines in between the ones below (or above if you are working on the bottom half) the ones you just made. You might not want them all to be exactly in the center, either. Making some of them "close" the lines below allow you to do cool rectangles spanning three horizontal lines, for instance. |
|
| 9b: All the Way to the Top
As Well Carve all the way to the top most cut-out, and pretty much most of the bottom as well. Again, the size of your "pattern" encompasses the entire front of your pumpkin. If you do decide to do a small, but perfectly round pumpkin, you would of course do this all the way around the pumpkin.
|
 |
| STEP 10: Customizing Your
Death Star Now the fun begins! Start customizing your Death Star by working with each of your block areas (or rectangle areas, if you left a couple of them really long). There are numerous ways to do this. The only rule of thumbs are those posted earlier - use straight lines, and smooth out all skinned areas. There are really no other rules, but here's a number of shots to get you started. HELP!!! I CUT THE MIDDLE LINE TOO DEEP!!! If you look closely at this picture, you'll notice that in the middle line, I actually tried to cut a deeper groove for Luck Skywalker's ship to go down. This was a baaaaad idea. The entire pumpkin actually split in half! The solution to this? Easy - Super Glue! Every veteran pumpkin carver has Super Glue on hand, preferably the one with the brush. When you use Super Glue on a pumpkin, it literally sizzles as it fuses the two pieces together. In the picture to the right, you can see some white crud in the middle line - that's the super glue where the pumpkin split in half! |

|
| You can cut out small squares from your block areas, or even shave off the sides of some, leaving thin rectangles. |
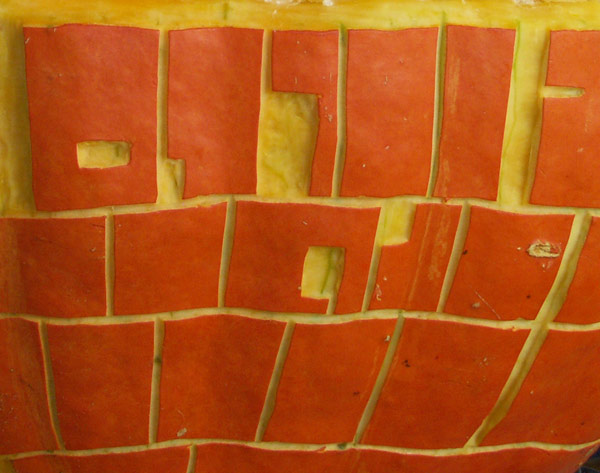
|
| You can cut out rectangles that span multiple horizontal lines. |
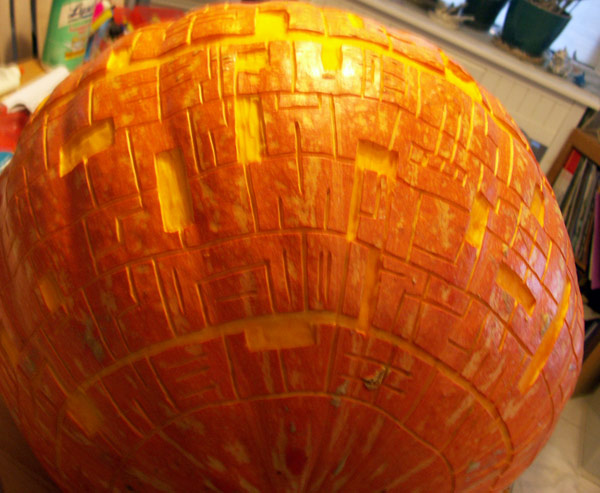
|
| There's all sorts of shapes you can do. You can make "Z" lines to break up a square, do two parallel lines in between a square, do skins that leave to maller squares showing that end up looking like windows...the possibilities are endless! |
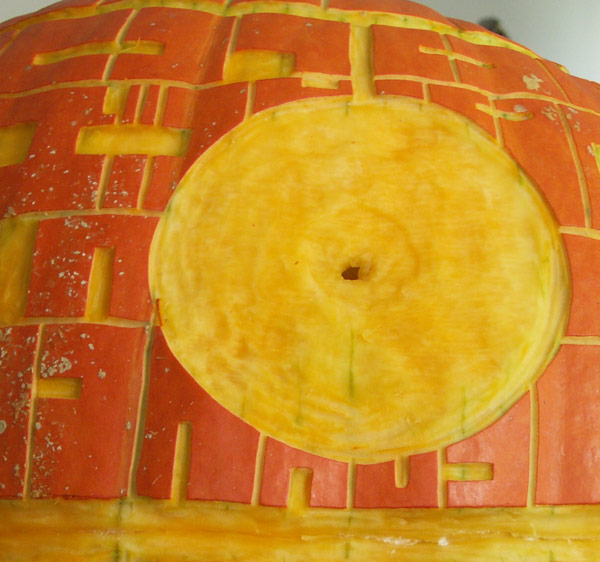 |
| STEP 11: Finalizing the
Circle FDepending on
whether you completely cleaned out the inside area or left a big chunk
underneath the circle, you will sculpt your circle differently. |
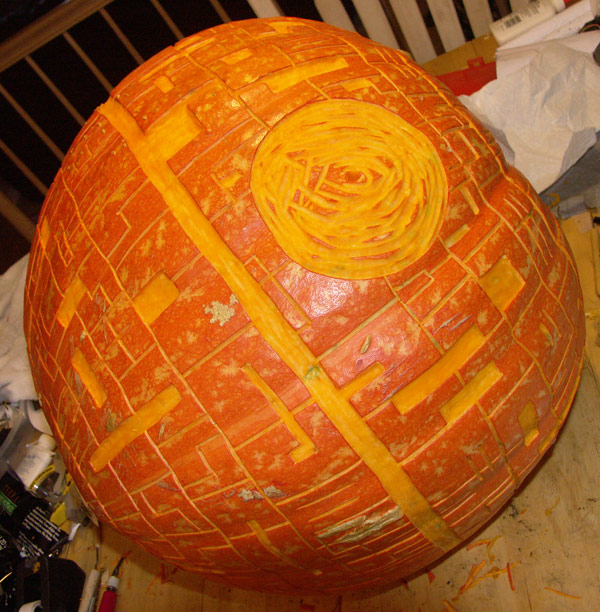
|
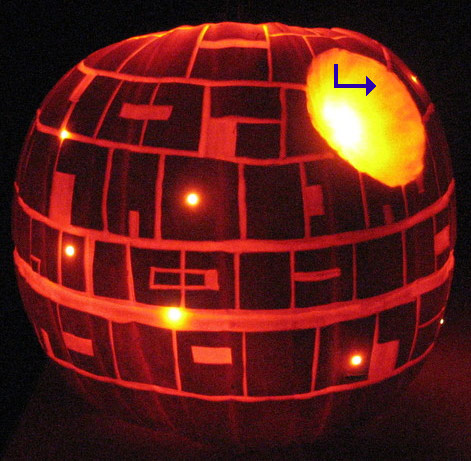
| A FAR better approach,
far more believable was done last year by
Feja and DH. This is close to what I intended this year, but simply
didn't have the time.
In scraping the pumpkin, they left a good chunk
of meat around the laser, which allowed them to cut deep into the Death
Star. This is a FAR more believable laser circle. I will definitely be doing
something similar next year. |
 |
| STEP 12: The Finishing
Touches
Finish Your Inside Scraping:
As an obvious aside, if you haven't stuck a
light or candle in it by this point to check your inside scrape job, now's
the time (obviously you want to do this in a darkened area to see the
problems). The goal is to get an even color shining throughout the pumpkin.
I generally use 3 candles in the Death Star while displaying it - one large
and two smaller candle pods (all pumpkin spice, of course!). Be careful if
your pumpkin has deep ridges - don't cut too far into the veins. You need to
dig deeper between the veins. If you use smaller candles, you can do the
finishing scraping with the candles on in a dark room. |
 |
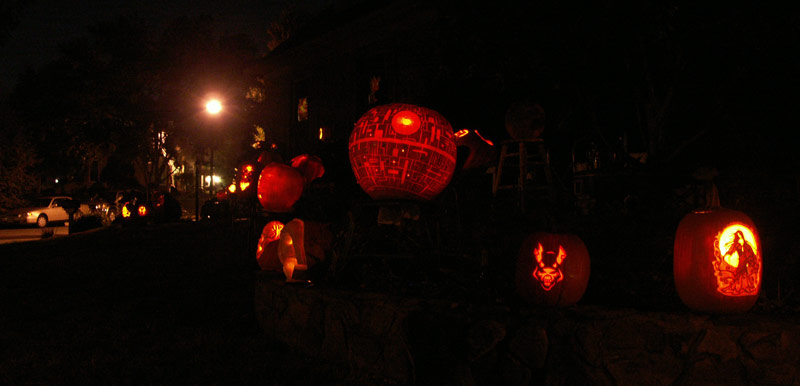
| Displaying Your Pumpkin For me, the display is critical. You want the Death Star to be at least 2-3 feet off the ground, preferably sitting on a hill, or up on a porch. This, along with a large sized pumpkin will give those approaching it an absolute sense of awe. My house sits at the top of a long hill, so in the picture below, the Death Star is positioned such that those coming up the street will see this from far away. For positioning, I have it up on a chair, sitting small stone ledge. I've done the Death Star two years in a row, and at this point cannot imagine not doing it. This is a HUGE hit. Pretty much everyone is blow away by it. If you do carve this, I would very much like to get a picture from you, so please email me if you could. I love to see others carve my patterns, but seeing Death Star carves would be even better! |
 |
 |
|